The Import section supports the bulk import of master data and user data. This data can be imported once or multiple times as needed.
Currently, imports are supported in CSV format. This makes it easy to prepare the data for import.
|
Hinweis: The order of the drop-down menu shown corresponds to the logical order of the imports (first create organizational units, then the default gate, then people, etc.) |
Import method
The import is performed using a “delta import” method, meaning that existing data is created once during the initial import, and each subsequent import supplements or modifies the existing data. The import automatically searches for the record based on a uniquely identifiable attribute. If no record with this attribute is found, a new record is created.
If an identifiable attribute is found, all fields of this record are checked, and if a data field has changed, it is overwritten.
If a field that was previously empty has been added, it is added to the record. This ensures that you can make adjustments to existing records at any time without creating duplicates.
A prerequisite is that the uniquely identifying attributes of a record do not change; otherwise, the record would be created again during the import. For a person, this is, for example, the primary email address; for other data, it is a combination of two fields (location name + assigned organizational unit).
This method also allows you to perform multi-step imports if you are sourcing your data from multiple data sources.
The multi-step method is also used to import linked data records into the system: For example, you must first create a company and locations (or, if you need to maintain many companies, import them using the “Organizational Units” or “Locations” import). Then, in a subsequent import, you can import the individuals and assign them directly to the organizational units and locations. For this purpose, the “Customer No.” field is used as an identifier on the organizational unit. You can have this generated automatically or maintain it manually.
It is therefore important to first create the companies and, if applicable, subordinate sub-organizations, and then the individual locations.
Once this structure is in place, you can simply import people and, if necessary, assets/CIs directly and have them automatically assigned during the import process.
|
Note: Some imports involve data relationships that build upon one another. These must therefore be run multiple times. An example is the person import with the “Supervisor” relationship. First, all persons must be imported; then, in a separate import, the “Supervisor” relationship between the persons must be created. This applies to all imports that establish relationships with existing data objects. If this is not observed, imports may return errors (e.g., “Target object not found”) if the related object has not yet been created in the import. |
Procedure for Importing
|
Important note for the administrator: An initial admin user was created during the initial setup. If this user’s name and email address were manually updated, the user may be overwritten with the new login name during the user import from Active Directory (if available there). The Active Directory login name must then be used for the next login. Alternatively, the administrator can manually remove the user from the Active Directory import and change the login name later. |
To import data, always follow these steps:
1.Select the desired import range from the drop-down menu that appears.
2.After selecting an import area, a list of the templates for that import area (on the left), the upload field (on the right), and a description of the data fields that can be imported for this dataset, along with an example (below), will appear.
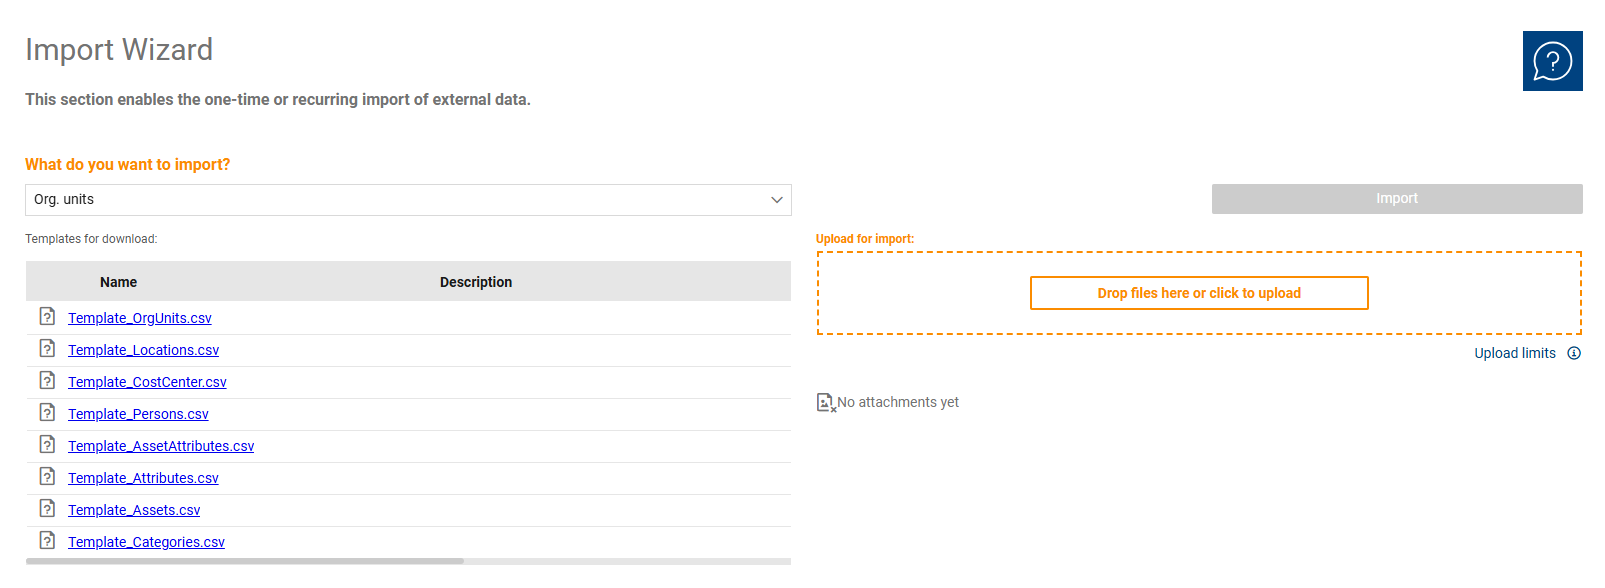
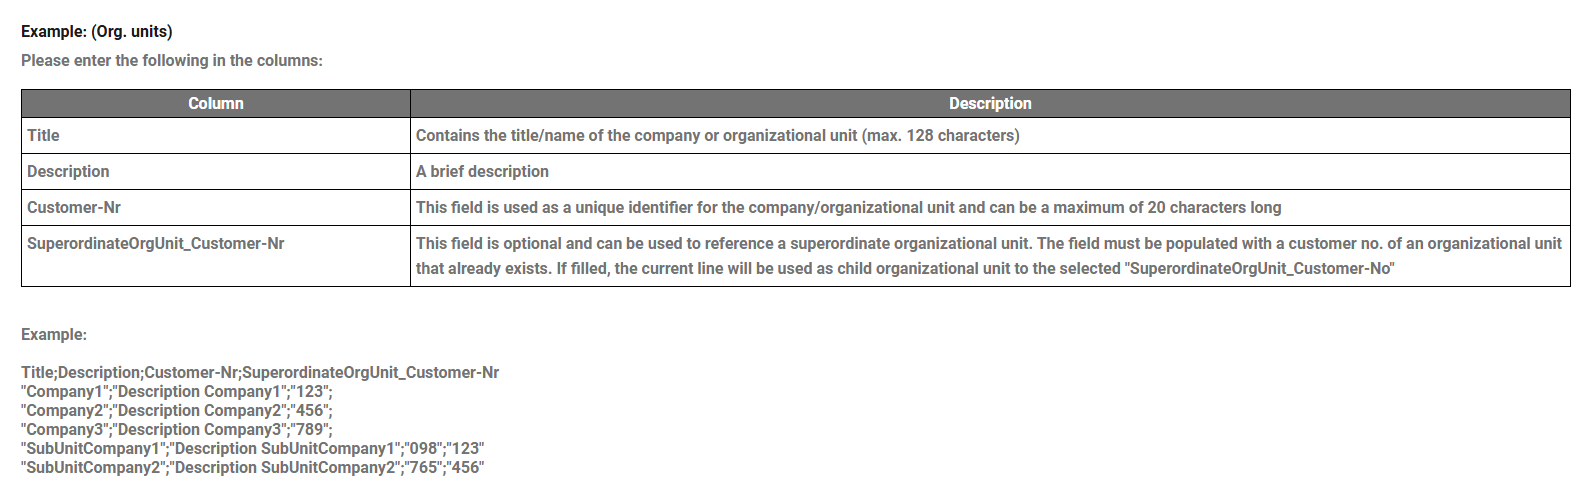
3.Download the appropriate template file and fill in the columns. Do not change the structure of the template!
4.Upload the completed CSV file using the “Upload for Import” field and start the import by clicking the “IMPORT” button. The import will now begin and may take several minutes, depending on the number of records to be created.
|
Note: The duration of imports depends on the amount of data. For a few dozen to a hundred records, this is usually not a major issue (<1–5 minutes); for very large amounts of data (e.g., many hundreds or thousands of people or assets), it can take 20–30 minutes or more, and the import may time out. The data will still be created even if a timeout occurs. Since the bTS server is locked for all users during the import—or rather, a freeze occurs—and the last unsaved action is lost in the event of a timeout, it is advisable not to perform large imports during regular working hours. |
5.Once the import is complete, the import history is displayed. This includes the uploaded CSV file, with the execution date in the filename, as well as the status and any errors that may have occurred due to the data in the import file (e.g., inability to make assignments due to missing identifying attributes, etc.).

You can run the import multiple times; the system will only create records for data that has been modified or added. Duplicates can only occur if the identifying characteristics in your data do not match.
Information: The import does not support all fields on the form for each record; it supports only the most important ones.